Activating LDAP synchronization of Redmine plugin to sync users from Active Directory to Redmine.
1. I’m using Bitnami as a Server of my Redmine, click start button and click Use Bitnami Redmine Stack cmd.

2. In Bitnami Redmine Stack cmd, clone the redmine_ldap_sync in github.com of Thorin or direct download and follow the procedure of Thorin. In the directory ..redmine\htdocs\plugins\ type the command
git clone git://github.com/thorin/redmine_ldap_sync.git

3. If the cloning is successful, you can update the ruby gems in the directory ..redmine\htdocs\plugins\ by typing
bundle install
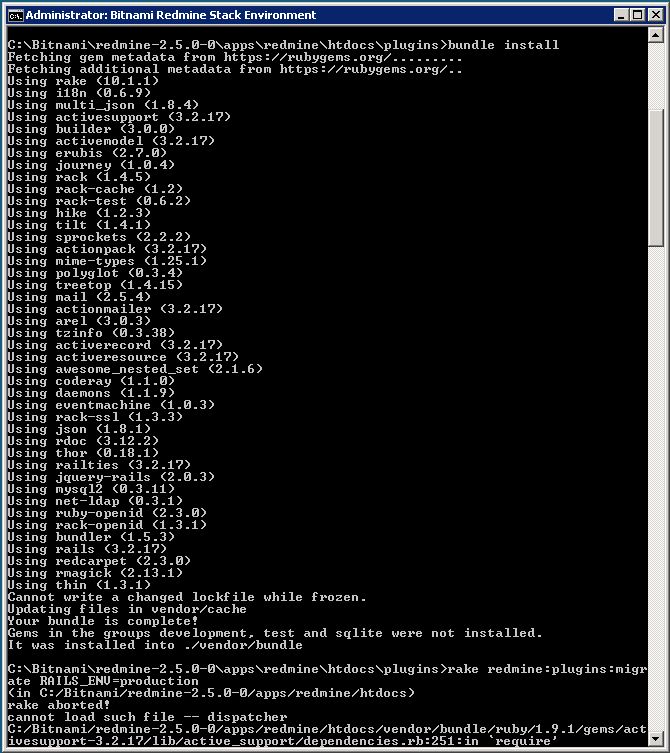
4. After updating the ruby gems, install the rake 10.1.1 under the directory ..redmine\htdocs\plugins\ because You will encounter the error of “rake aborted!“. To install Rake 10.1.1 type the command
gem install rake -v 10.1.1
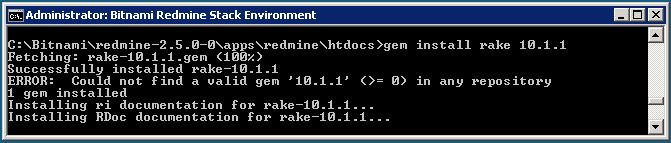 Successfully installed rake-10.1.1, never mind the error display because under the error 1 gem installed is display.
5. In the directory ..redmine\htdocs\plugins\, migrate the database using the command
rake redmine:plugins:migrate RAILS_ENV=production

6. After migrating the database, install the plugin redmine_ldap_sync by typing command
rake -T redmine:plugins:ldap_sync RAILS_ENV=production

7. Restart the Redmine services in the bitnami Manage Servers by clicking Restart All.

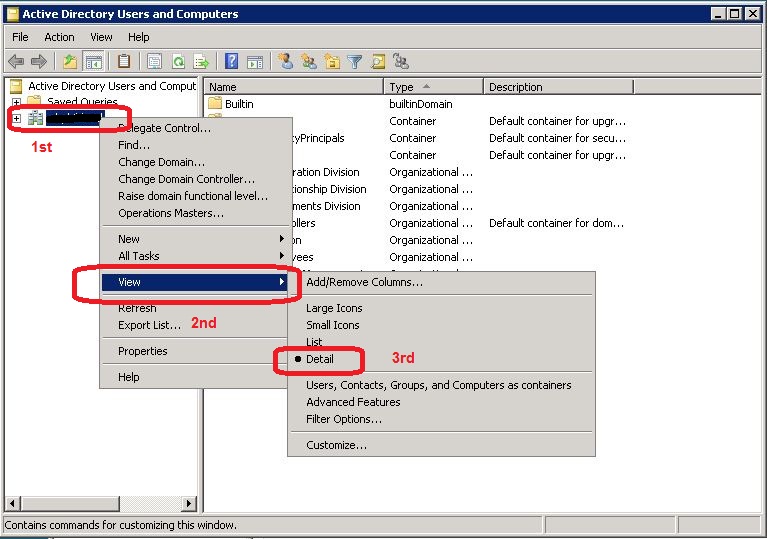
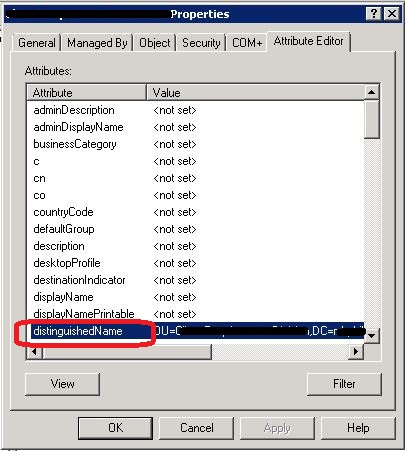
Note: The Base DN is important to connect the Redmine in your LDAP Server to sync the users from Active Directory. To get the correct Base DN, follow these link.
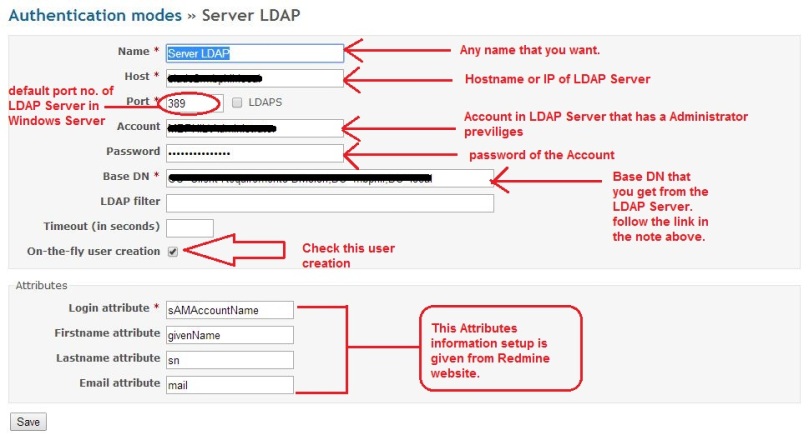
8. After restarting the all servers, login as administrator in Redmine, click Administration, in the left menus click LDAP Authentication and click new Authentication Mode or edit your existing.

9. In the LDAP Authentication Modes, see my setup below for your reference and save your setup then don’t forget to follow the link in the step 7 note above.
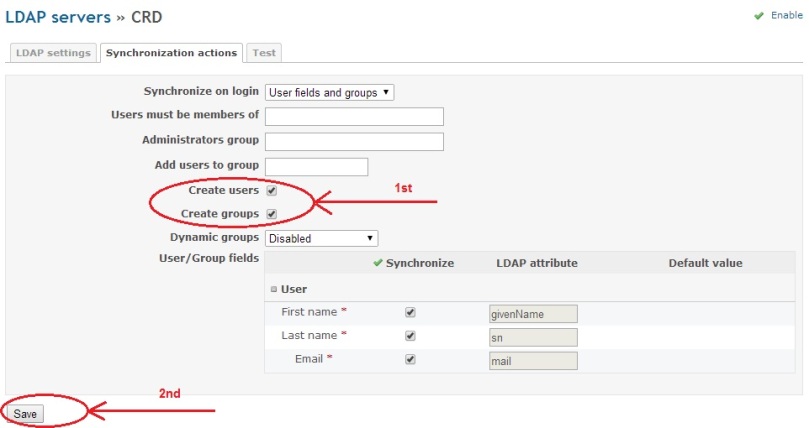
10. After the Authentication modes, back to Administration page and click the LDAP synchornization in the menus. see my setup page below.

11. After the LDAP settigs, click the synchronization tab then save your setting. see my setting below.
12. After the Synchronization page, click the Test tab and click the generate to test the connection from LDAP Server. see my testing page below.